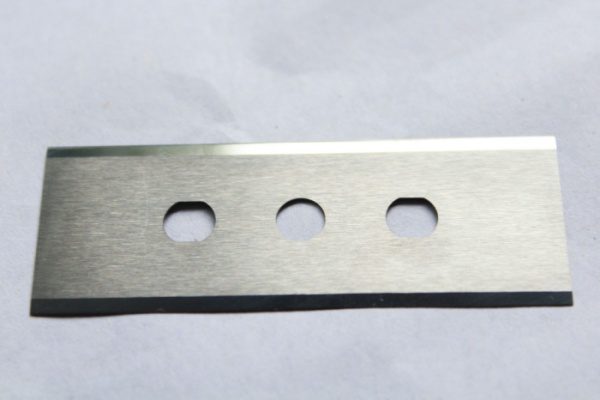
Carbide tool chipping costs more than the replacement insert. When a cutting edge fractures mid-cycle, the immediate loss is the tool itself. The secondary losses—scrapped parts, interrupted production, surface finish rework, and the time spent diagnosing what went wrong—often exceed the tool cost by a factor of five or more. The problem compounds in high-volume operations where a single chipped insert can propagate defects across dozens of parts before anyone catches it.
The frustrating part is that most chipping is preventable. The fractures follow predictable patterns tied to specific combinations of cutting parameters, material properties, and tool geometry. Once you understand what drives the failure mode, the fixes are usually straightforward adjustments rather than expensive overhauls.
Why Carbide Edges Fracture in the First Place
Carbide tool chipping happens when localized stress at the cutting edge exceeds the material’s fracture toughness. The stress can be mechanical, thermal, or both acting together. What makes carbide tricky is that it combines extreme hardness with relatively low ductility—the same property that lets it hold a sharp edge also makes it brittle under the wrong conditions.
Micro-chipping shows up as hairline fractures along the cutting edge, often invisible without magnification. These small fractures accumulate over time, gradually dulling the edge and increasing cutting forces. The progression is slow enough that operators sometimes attribute the degraded performance to normal wear rather than recognizing the underlying chipping mechanism.
Macro-chipping is harder to miss. A visible chunk of the cutting edge breaks away, sometimes taking enough material to render the insert unusable in a single event. The causes differ from micro-chipping: sudden impact loads, severe thermal gradients, or material defects within the carbide substrate itself.
| Characteristic | Micro-Chipping | Macro-Chipping |
|---|---|---|
| Size of Fracture | Microscopic, hairline cracks | Visible, larger fragments |
| Primary Cause | Abrasive wear, thermal fatigue | High impact loads, severe thermal shock |
| Progression | Gradual, leads to edge dulling | Sudden, catastrophic tool failure |
| Impact on Workpiece | Poor surface finish, dimensional drift | Severe surface damage, scrap parts |
| Detection | Microscopic inspection, process monitoring | Visual inspection during or after cut |
The distinction matters for troubleshooting. Micro-chipping points toward cumulative stress factors like thermal cycling or abrasive wear. Macro-chipping usually indicates a discrete event: an interrupted cut, a hard inclusion in the workpiece, or a parameter setting that pushed the tool past its mechanical limits.
How Cutting Parameters Create the Conditions for Failure
The relationship between machining parameters and carbide tool chipping is direct but not always intuitive. Higher feed rates increase the mechanical load on each tooth engagement, but the failure mode depends on whether the load exceeds the carbide’s compressive strength or its impact resistance.
Excessive feed rates subject the cutting edge to forces that concentrate at the weakest point of the edge geometry. If the edge preparation includes a chamfer or hone radius, the stress distribution changes. A sharper edge cuts more freely but concentrates stress at a smaller area. A larger hone spreads the load but increases cutting forces and heat generation.
Cutting speed affects the thermal component. Higher speeds generate more heat at the tool-chip interface, which can soften the workpiece material and actually reduce cutting forces in some cases. But if the heat exceeds the thermal stability of the carbide grade or its coating, the edge loses hardness and becomes vulnerable to abrasive wear and thermal cracking.
Interrupted cutting creates a different stress pattern entirely. Each time the tool enters and exits the workpiece, it experiences an impact load followed by a thermal cycle. The repeated mechanical and thermal shocks accumulate damage at the cutting edge, eventually nucleating cracks that propagate into chipping. This is why the same carbide grade that performs well in continuous turning might fail rapidly in milling or interrupted boring.
Depth of cut interacts with all these factors. Deeper cuts increase the contact area between the tool and workpiece, spreading the load across more of the cutting edge. But they also increase the total cutting force and heat generation. The optimal depth depends on the specific combination of tool geometry, workpiece material, and machine rigidity.
What the Workpiece Material Tells You About Chipping Risk
Workpiece material hardness is the most obvious factor, but it’s not the only one that matters. The material’s abrasiveness, thermal conductivity, and tendency to work-harden all influence how the cutting edge degrades over time.
Harder materials impose higher cutting forces at any given parameter setting. The carbide grade must have sufficient hardness to resist abrasive wear while maintaining enough toughness to absorb the mechanical loads without fracturing. This is where carbide grade selection becomes critical: a grade optimized for finishing soft steel will chip rapidly when applied to hardened tool steel or superalloys.
Material inconsistencies within the workpiece create a different problem. Hard spots, inclusions, or variations in heat treatment can cause sudden localized impacts that the tool cannot anticipate. The cutting edge might handle the nominal material properties just fine, then encounter a hard inclusion that exceeds its impact resistance. This type of failure looks like macro-chipping and often occurs at random locations along the cutting edge.
Work-hardening materials like austenitic stainless steels and nickel alloys present a compounding challenge. The surface layer hardens as it’s cut, so each subsequent pass encounters harder material than the previous one. If the depth of cut is too shallow, the tool rides on the work-hardened layer rather than cutting beneath it, dramatically increasing wear and chipping risk.
Thermal conductivity affects how heat distributes between the tool, workpiece, and chips. Materials with low thermal conductivity, like titanium alloys, concentrate heat at the cutting edge rather than dissipating it into the workpiece. This accelerates thermal fatigue and increases the risk of thermal shock when coolant reaches the heated zone.
Recognizing Chipping Before It Becomes Catastrophic
The early signs of carbide tool chipping often appear in the process data before they’re visible on the tool itself. Cutting forces increase as the edge degrades, which shows up as higher spindle load or feed force readings. Vibration signatures change as the cutting edge geometry deteriorates, sometimes producing audible changes in the machining sound.
Surface finish degradation is another leading indicator. As micro-chipping accumulates along the cutting edge, the tool leaves increasingly rough surfaces on the workpiece. The roughness pattern often correlates with the chipping location: periodic marks suggest chipping at a specific point on the insert, while uniform roughness indicates distributed edge degradation.
Chip formation changes as well. A sharp cutting edge produces consistent chip morphology, while a chipped edge produces irregular chips with varying thickness and curl. In some materials, a damaged edge causes the chips to weld to the tool face, creating built-up edge that accelerates further chipping.
Post-machining inspection of the tool reveals the damage directly. Under magnification, micro-chipping appears as a serrated or scalloped edge profile rather than the smooth geometry of a new insert. Macro-chipping is visible to the naked eye as missing material or irregular edge contours.
The inspection frequency depends on the application. High-value parts or tight-tolerance operations justify checking the tool after every part or every few cycles. High-volume production of less critical parts might use statistical sampling or process monitoring to trigger inspections only when the data suggests a problem.
Preventing Chipping Through Tool Geometry and Edge Preparation
Tool geometry optimization is one of the most effective levers for preventing carbide tool chipping. The edge preparation, specifically the chamfer angle, hone radius, and land width, determines how the cutting edge handles the mechanical and thermal loads of the cut.
A honed edge, where the sharp corner is replaced with a small radius, strengthens the cutting edge by distributing stress over a larger area. The tradeoff is increased cutting forces and heat generation, since the tool must displace more material to achieve the same depth of cut. The optimal hone radius depends on the workpiece material, cutting parameters, and the specific failure mode you’re trying to prevent.
For interrupted cutting applications, a larger hone radius or a chamfered edge preparation provides better impact resistance. The chamfer acts as a sacrificial layer that absorbs the initial impact of each engagement, protecting the primary cutting edge behind it. This is why milling inserts typically have more aggressive edge preparations than turning inserts designed for continuous cuts.
On a project machining a nickel alloy with standard inserts, the tools were micro-chipping after only a few passes. The failure analysis pointed to thermal fatigue combined with the impact loads of the interrupted cut. After switching to an edge preparation with a controlled hone radius of 0.05 mm and revising the tool path to ensure smoother engagement, tool life increased by 40% and surface finish improved noticeably. The adjustment cost nothing in terms of hardware; it was purely a matter of matching the edge geometry to the application.
Rake angle affects the cutting forces and chip flow. A more positive rake reduces cutting forces but weakens the edge, while a more negative rake strengthens the edge at the cost of higher forces and heat. The choice depends on the balance between wear resistance and chipping resistance required for the specific application.
How Coolant Strategy Affects Edge Integrity
Proper coolant application does more than remove heat from the cutting zone. It lubricates the tool-chip interface, flushes chips away from the cutting edge, and prevents the thermal cycling that leads to thermal shock in tools.
The key is consistency. Intermittent coolant flow creates worse conditions than no coolant at all, because the cutting edge experiences rapid temperature swings each time the coolant reaches it. These thermal cycles induce stresses that crack the carbide surface, eventually leading to chipping. If coolant cannot be applied consistently, dry machining with an appropriate carbide grade and coating may produce better results.
Coolant pressure and direction matter as much as flow rate. High-pressure coolant directed at the cutting zone penetrates the tool-chip interface more effectively, reducing friction and heat generation at the source. It also improves chip evacuation, preventing the re-cutting of chips that can damage the cutting edge.
Chip evacuation issues contribute to chipping in several ways. Chips that accumulate in the cutting zone can be re-cut by the tool, causing mechanical impacts that damage the edge. In deep pockets or blind holes, poor chip evacuation can pack chips against the tool, increasing cutting forces and heat. The solution usually involves a combination of coolant pressure, tool geometry that promotes chip breaking, and cutting parameters that produce manageable chip sizes.
Through-tool coolant delivery, where the coolant flows through channels in the tool body and exits at the cutting edge, provides the most effective cooling and chip evacuation. This approach is standard for drilling and increasingly common for milling and turning applications where chipping is a concern.
Why Machine Rigidity Determines Your Chipping Threshold
Tool holder rigidity and machine tool stability set the baseline for how much vibration the cutting process generates. Vibration amplifies the mechanical loads on the cutting edge, turning what should be a smooth cutting action into a series of impacts that accumulate damage over time.
The sources of vibration include spindle runout, tool holder imbalance, workpiece fixturing compliance, and the dynamic response of the machine structure itself. Any of these can excite chatter, a self-reinforcing vibration pattern that produces characteristic marks on the workpiece surface and accelerates tool wear.
A rigid setup absorbs cutting forces more effectively, preventing the deflections that cause chatter and sudden impacts on the cutting edge. This is why the same tool and parameters that work perfectly on a heavy-duty machine might chip rapidly on a lighter machine with less structural rigidity.
Tool overhang is a critical factor. Longer tool extensions reduce stiffness and increase the tendency toward vibration. When chipping occurs with long-reach tools, shortening the overhang or switching to a more rigid tool holder often solves the problem without changing any cutting parameters.
Workpiece fixturing deserves equal attention. A part that moves or vibrates during cutting subjects the tool to unpredictable loads that can exceed its chipping threshold. Improving the fixture, adding support at thin sections, or changing the clamping strategy can eliminate chipping that no amount of parameter adjustment would fix.
Selecting Carbide Grades for Chipping Resistance
The tungsten carbide properties that determine chipping resistance come down to grain size and binder content. Fine-grained carbides with lower cobalt content offer higher hardness and wear resistance but lower toughness. Coarser grains with higher cobalt content provide greater toughness and impact resistance at the cost of some hardness.
For applications where chipping is the primary failure mode, selecting a tougher grade often extends tool life even if it means accepting slightly faster wear. The wear is predictable and gradual, while chipping is sudden and often catastrophic. A tool that wears steadily can be replaced on a schedule; a tool that chips unpredictably disrupts production.
The carbide grade selection should match the specific cutting conditions. Interrupted cutting, hard materials, and unstable setups all favor tougher grades. Continuous cutting of softer materials with rigid setups can use harder grades for longer wear life without chipping risk.
Carbide manufacturers publish application charts that map their grades to specific material groups and cutting conditions. These charts provide a starting point, but the optimal grade for a specific application often requires testing. The goal is to find the grade that balances wear resistance and toughness for the specific combination of workpiece material, cutting parameters, and machine conditions.
How Coatings Extend the Chipping Threshold
Coating technologies for tools add a thin, hard layer to the carbide substrate that improves wear resistance, reduces friction, and provides a thermal barrier. These effects all contribute to chipping resistance by reducing the stresses that accumulate at the cutting edge.
The coating acts as a sacrificial layer that absorbs abrasive wear before it reaches the carbide substrate. As long as the coating remains intact, the cutting edge maintains its geometry and the tool performs consistently. Once the coating wears through, the exposed carbide degrades more rapidly.
Different coatings optimize for different conditions. Titanium Nitride (TiN) provides general-purpose hardness improvement. Titanium Carbonitride (TiCN) adds lubricity for better chip flow. Aluminum Titanium Nitride (AlTiN) and Aluminum Chromium Nitride (AlCrN) offer high hot hardness and oxidation resistance for high-temperature applications like dry machining of superalloys.
| Coating Type | Primary Benefit | Key Application | Chipping Resistance |
|---|---|---|---|
| TiN | General purpose, good hardness | Steels, cast iron | Moderate |
| TiCN | Increased hardness, improved lubricity | Stainless steels, non-ferrous | Good |
| AlTiN | High hot hardness, oxidation resistance | High-temp alloys, dry machining | Excellent |
| AlCrN | High hot hardness, thermal stability | Hardened steels, superalloys | Excellent |
| Diamond-like Carbon (DLC) | Very low friction, extreme hardness | Aluminum, non-ferrous, plastics | Good (reduces friction-induced chipping) |
The coating must match the application. A coating optimized for high-temperature stability provides little benefit in a low-speed, high-feed application where mechanical loads dominate. Conversely, a general-purpose coating may fail rapidly in high-speed dry machining where thermal stability is critical.
Hubei Fotma Machinery Co., Ltd. produces the cemented carbide and tungsten alloy substrates that form the foundation for coated tooling. More than 30 years of material research has enabled the development of carbide grades engineered for specific combinations of hardness, toughness, and thermal stability. This substrate quality directly affects how well coatings adhere and perform, which in turn determines the tool’s resistance to chipping under demanding conditions.
Diagnosing Chipping After It Happens
When carbide tool chipping occurs, the failure pattern contains information about the root cause. Systematic analysis of the chipped tool, the workpiece, and the process conditions usually points toward specific corrective actions.
Start with the tool itself. Note the location of the chipping along the cutting edge, the size and shape of the fractures, and whether the damage is concentrated or distributed. Corner chipping often indicates excessive feed or insufficient lead angle. Edge-line chipping suggests vibration or an interrupted cut problem. Crater wear behind the cutting edge points toward thermal overload.
Examine the workpiece for corresponding marks. Chipping leaves characteristic patterns on the machined surface that correlate with the damage location on the tool. These marks help confirm the diagnosis and indicate whether the chipping occurred at a specific point in the cut or throughout the operation.
Review the process conditions: cutting speed, feed rate, depth of cut, coolant flow, and any interruptions or anomalies during the cut. Compare these to the tool manufacturer’s recommendations and to previous successful operations with the same setup. Often the root cause is a parameter that drifted from its nominal value or a condition that changed without anyone noticing.
For minor micro-chipping, regrinding carbide tools can restore the cutting edge geometry and extend the tool’s useful life. The regrind must remove all the damaged material and re-establish the correct edge preparation. If the chipping extends too deep into the carbide, regrinding may not be practical and replacement is the better option.
For macro-chipping, the priority is preventing recurrence. The tool is usually beyond salvage, but the failure provides valuable information for adjusting the process. Reduce the mechanical loads by decreasing feed or depth of cut. Improve thermal management with better coolant application. Consider a tougher carbide grade or a more robust edge preparation for the replacement tool.
Frequently Asked Questions
What are the common signs of carbide tool chipping?
The process often signals chipping before the tool shows visible damage. Cutting forces increase as the edge degrades, which appears as higher spindle load readings. Vibration patterns change, sometimes producing an audible difference in the machining sound. Surface finish on the workpiece deteriorates, with roughness increasing or periodic marks appearing. Chip formation becomes irregular, with varying thickness and curl. Direct inspection of the tool under magnification reveals the serrated or scalloped edge profile characteristic of micro-chipping, while macro-chipping is visible as missing material along the cutting edge.
How does workpiece material affect carbide tool chipping?
The workpiece material determines the forces, temperatures, and wear mechanisms the cutting edge must withstand. Harder materials impose higher cutting forces at any given parameter setting, requiring carbide grades with sufficient hardness and toughness to handle the load. Abrasive materials accelerate edge wear, which can progress into chipping if the wear pattern concentrates stress at weak points. Materials with inclusions or varying hardness cause sudden impact loads that can fracture the edge. Low thermal conductivity materials concentrate heat at the cutting zone, increasing thermal fatigue and the risk of thermal shock when coolant reaches the heated edge.
Can tool coatings prevent chipping in carbide tools?
Coatings reduce chipping risk by addressing several contributing factors simultaneously. The hard coating layer resists abrasive wear, maintaining the cutting edge geometry longer. Reduced friction at the tool-chip interface lowers cutting forces and heat generation. Thermal barrier properties protect the carbide substrate from temperature extremes. Coatings like AlTiN and AlCrN provide excellent chipping resistance in high-temperature applications by maintaining hardness at elevated temperatures and resisting oxidation. The coating must match the application conditions; a general-purpose coating may not provide adequate protection in demanding applications where thermal or mechanical loads are extreme.
What impact does improper chip evacuation have on carbide tools?
Poor chip evacuation creates multiple pathways to chipping. Chips that remain in the cutting zone can be re-cut by the tool, causing mechanical impacts that damage the edge. Accumulated chips increase friction and heat at the cutting interface, accelerating thermal fatigue. In confined spaces like deep pockets or blind holes, packed chips can deflect the tool or workpiece, causing unpredictable loads that exceed the edge’s impact resistance. Effective chip evacuation through proper coolant pressure, tool geometry that promotes chip breaking, and appropriate cutting parameters prevents these failure modes.
How often should carbide tools be inspected for early signs of chipping?
Inspection frequency depends on the consequences of tool failure and the predictability of the process. High-value parts or tight-tolerance operations justify checking the tool after every part or every few cycles, since the cost of a scrapped part exceeds the time spent on inspection. High-volume production of less critical parts can use statistical sampling or process monitoring to trigger inspections when cutting forces, vibration, or surface finish data indicate a potential problem. As a baseline, visual inspection before each shift catches gross damage, while periodic microscopic inspection reveals the micro-chipping that precedes more serious failures.
Are there specific carbide grades more resistant to chipping?
Carbide grades with higher toughness resist chipping better than grades optimized purely for hardness and wear resistance. Toughness comes from coarser tungsten carbide grain size and higher cobalt binder content. These grades absorb impact loads and resist crack propagation better than fine-grained, low-cobalt grades. For interrupted cutting, hard materials, or unstable setups, selecting a tougher grade often extends tool life even if it means accepting slightly faster abrasive wear. The optimal grade balances wear resistance and toughness for the specific combination of workpiece material, cutting parameters, and machine conditions in your application. If your current tooling strategy involves frequent chipping failures, discussing your specific requirements with a carbide supplier can identify grades better suited to your conditions. Contact Hubei Fotma Machinery at [email protected] or +86 13995656368 to explore options.
If you’re interested, check out these related articles:
Molybdenum Wire Price And Its Importance In Industrial Applications
What Material Is Cuni44 Copper Nickel Alloy Plate